

Luke Skywalker needed the force to stop the empire, you need countermeasures to defeat your risks.
Contents
See the Countermeasures in the diagram itself
The Threats & Countermeasures tab
Multiple Select for Countermeasures
Change the Countermeasures Status
Seeing countermeasures applicable to a Standard
Create Issue Trackers from your Countermeasures
Configuring your Issue Trackers
A video overview of Countermeasures (and Threats) is available here.
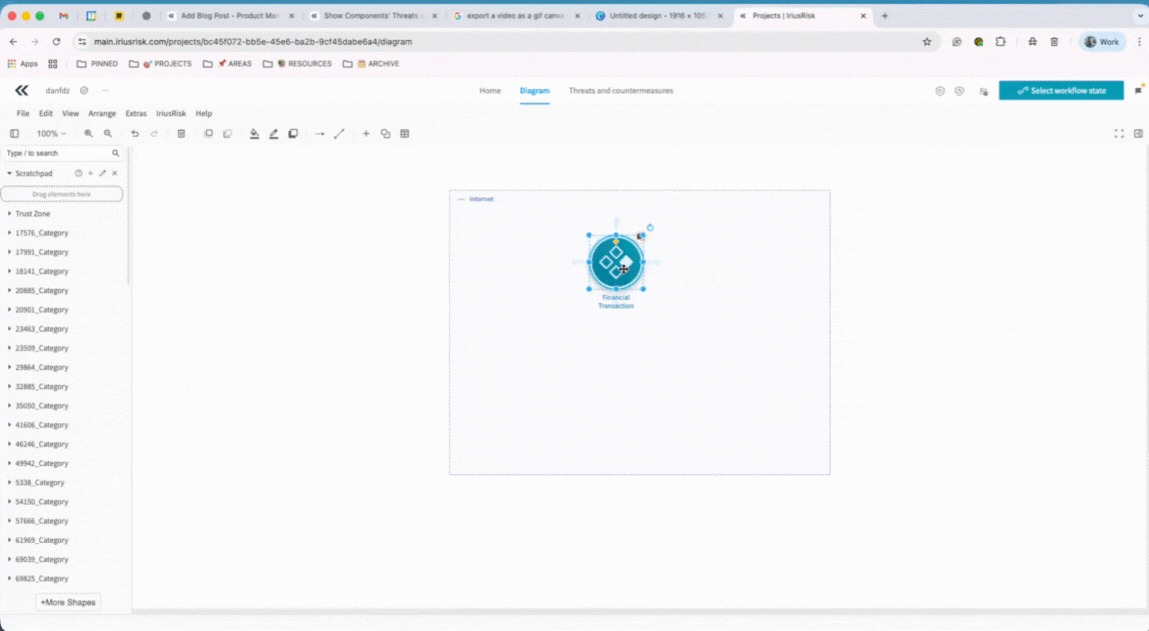
You can navigate to the full Threats & Countermeasures tab, as per the instructions further down, however you can also see this information directly in the diagram view, without having to leave this area. This can be helpful to get snapshot information side by side quickly. Click on the component and you will see a shortcut menu which includes the countermeasure (and threat) details. These views can be expanded or compared side by side.
This section focuses on what actions can be taken to mitigate the risks. We will go through the Countermeasures (security controls) to show you the options to lower the risk within your threat model.
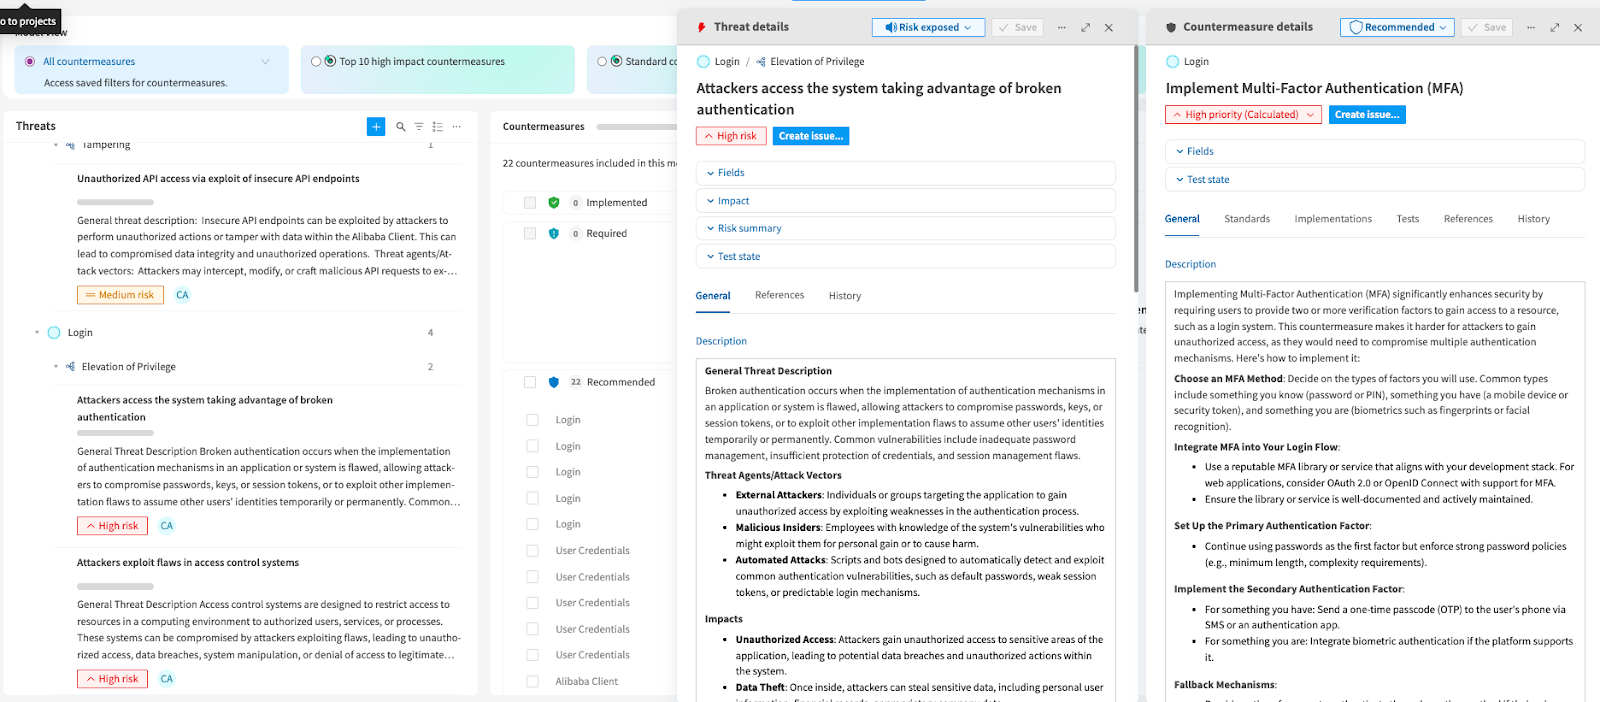
If you are not already in the 'Threats and countermeasures' view, you can navigate to it at the top of the screen - next to 'Diagram'. This is what the tab looks like.

If you wish, you can widen the column while you work on the Countermeasures area, and even minimize the Threats column all together until you are finished. This view will also be saved for the next time you log in. The columns can easily be changed simply by dragging the columns left or right as you require.

When you select a Countermeasure Detail, it will appear as a Context Window in the same manner as the Threat Details. This is to retain the information in the background, and makes navigating between threats and countermeasures easier, as you can click from one to the other, and even view them side by side.
Smart Views enhance project analysis by leveraging AI to generate dynamic views of threats and countermeasures. They are generated automatically when the user clicks on them, ensuring seamless adoption for those with Jeff AI enabled. By choosing one of the four views, such as Top 10 high impact countermeasures, you are then given a focus to streamline your effort and work on specific tasks. You can leave your Smart Views static as they are, and go through one by one to mitigate. If you wish, you can then run the analysis again, to see the next top 10 appear. Learn more about it here.

We have introduced a one-click multi-select option for countermeasures, streamlining bulk operations and significantly reducing the effort required to manage large datasets. Making bulk actions like marking them as "Not Applicable" less time-consuming and more efficient. All from within the threat view.

On the right hand side you can filter, expand and minimize depending what you’d like to see. To change the status of a Countermeasure, click on the three ellipses and you will see various options to mark them as 'Required' instead of 'Recommended', for example.

You can even mark as 'Not Applicable' but must add a reason before this status is reflected. The same applies if you mark a threat as 'Rejected'. Which perhaps you may do this with certain context if say it was a third party responsibility for example.


The model will highlight in the top right when you have changed a status.

If you minimize the Recommended section, you will now see there is one item marked as 'Required', and one marked as 'Not Applicable'. And at the end you will have one listed as 'Rejected'.


In addition, Comments are now consistently displayed from newest to oldest in both threat and countermeasure details. This is helpful for users especially where there have been a high number of comments, and it is required to have the most recent remarks seen first in order to be informed or see context straight away.
Perhaps you need to comply with EU-GDPR, PCI, NIST 800-53, or others. You can apply a standard to your Project, and it will filter the results based upon those that are Non-Compliant against that standard. You can then easily mark these as ‘Required’ so that these are mitigated first.
Below are the results when the NIST 800-53 Standard is selected. There are 6 identified as Non Compliant.

Expand this section, select the six items, and go to the blue ‘Bulk edit’ button on the right. Here is where you can mark them as 'Required'.

This is an important section. Whether you use Jira, CA Rally, Azure DevOps, Servicenow, or a mixture of these tools, IriusRisk offers two-way integration with all of them. Meaning any status changes, comments or edits in the issue tracker, are reflected directly into your threat model, including adjusting your Project’s overall risk level.
Select the Countermeasures - in the example two have been chosen - select the blue ‘Bulk edit’ button, and choose Issues, then 'New Issues'. Here you have three choices:
If you are yet to configure your issue trackers, your view will look like this:

Jump to the next heading ‘Configuring Issue Trackers’ to begin setup.
It is possible to create issues in an issue tracker ticket (for instance, in Azure DevOps, Jira, Servicenow or CA Rally) to better manage the mitigation of threats within your systems. To facilitate this, it is possible in IriusRisk to configure multiple issue tracker systems and projects at a global level, allowing individuals to leverage these configurations at lower levels of granularity.
Adding New Issue Tracker Profiles:


You also have the option to add an issue tracker configuration manually for a project if you wish, to reduce the number of issue tracker options seen. This can be helpful if you have multiple trackers configured and you only want to show one for a specific project.
This combines project-level customization with globally managed connection settings for a scalable, secure approach.
Previously, Jira and Rally profiles were locked at a global level, limiting project-level flexibility, while custom profiles lacked central governance. Now teams can tailor issue tracker behaviour per project while maintaining secure, centrally managed connections. Changes to connection settings automatically apply across all projects, ensuring consistency and control.

In the ever-evolving world of software development, keeping track of changes is critical. For organizations with large, complex systems, manually reviewing project snapshots to identify component changes can be a time-consuming and error-prone task. We know that threat model practitioners often feel frustrated by the need to manually compare snapshots, especially when dealing with extensive software portfolios.
With this enhancement, you will be now able to see the differential in Threats and Countermeasures between two versions of a project.
NOTE: Only available in the backend / API


